Yoga is often perceived as practice of few asanas or poses; however, it is more than just asanas, it is an art; an effective system of practice; which helps balancing one’s health at physical, mental, social and spiritual level. It is a low-impact exercise that even helps practitioner to gain inner peace with yoga. Yoga does not just focus on one part of the body like most workouts, in fact, it brings all the aspects such as mind, body and breathe into one line.
Practicing yoga regularly not only helps one to become more flexible, toned, and healthy, but also one can gain inner peace with yoga. Every action we perform while practicing yoga activates nervous system – brain, muscles, bones, and emotions all at once. Yoga poses bring a holistic change that help us lead a balanced and more fulfilling life.
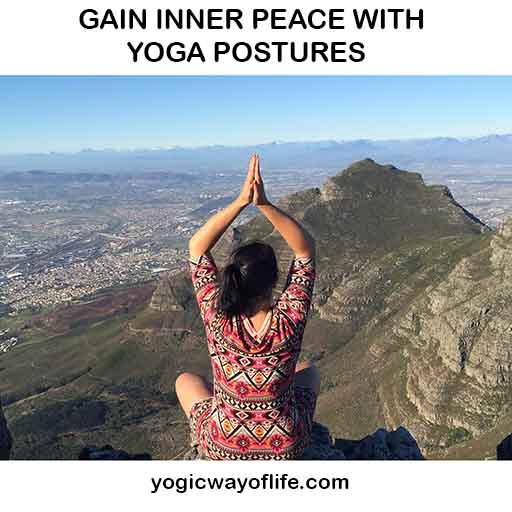
To gain inner peace with yoga postures one should incorporate it in his daily life. Here are 7 best poses that you can do to achieve a peaceful state of mind:
The Easy Sitting Pose (Sukhasana)
The first pose in ‘gain inner peace with yoga postures’ series is Sukasana.
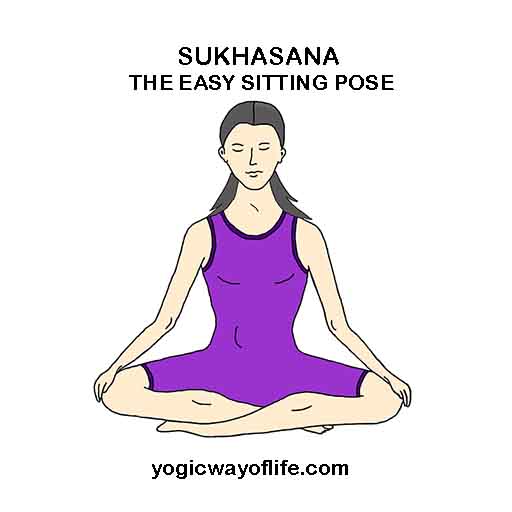
Sukhasana or the easy sitting pose is one of the simplest poses for meditation suited for all beginners. Sukhasana comes from the Sanskrit work ‘Sukham’ which can mean ‘comfort’, ‘easy’, ‘joyful’, ‘pleasure’, etc. It can be done by all age groups.
Here are the steps to perform The Easy Sitting Pose:
- Sit on the floor with legs stretched out. Always use a yoga mat or a cushion or a carpet while sitting on the floor.
- Fold the left leg and tug it inside the right thigh.
- Then fold the right leg and tug in inside the left thigh.
- Keep the hands on the knees. Jnana mudra or Chin mudra can be used if you are using this posture for meditation.
- Sit erect with spine straight.
- Relax your whole body and breathe normally.
- Maintain this position for as long as comfortable.
Cat-Cow Pose (Marjaryasana-Bitilasana)
The second pose in the ‘gain inner peace with yoga postures’ series is Marjariasana or Cat-cow pose, which provides a gentle massage to your spine. The gentle movement when coordinated with the breath stimulates the belly organs and calms the brain.
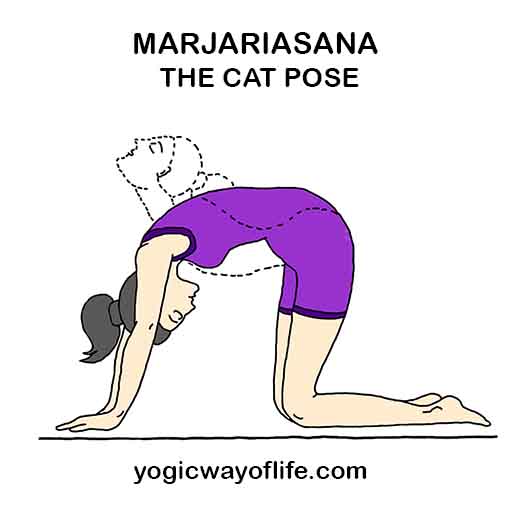
Here are the steps to perform Cat Cow Pose:
- Start on your hands and knees in a “tabletop” position.
- Your knees should be directly below your hips and your wrists, elbows and shoulders should be in line and perpendicular to the floor.
- Strongly press your palms into the ground and broaden your shoulders and keep the head in a neutral position.
- For Cow Pose: take a deep breath and drop the stomach towards the floor, while uplifting your chest and chin fix your gaze towards the ceiling.
- For cat pose: Breath out, arch your back towards the sky, pull your stomach to your spine, and touch your chest with chin.
- Coordinate the movement sand flow from cat to cow and vice-versa with inhalation and exhalation.
The Child Pose (Balasana)
The third pose in the ‘gain inner peace with yoga postures’ series is Balasana.
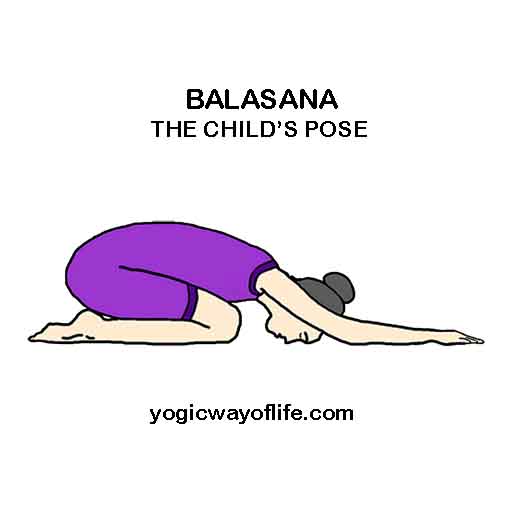
Balasana or the Child’s Pose is an excellent resting pose. In Sanskrit, Bala means Child and Asana means yoga pose. This asana or pose has been created by observing young children. This pose deeply calms your mind, lengthens the back body, hips and reduces fatigue.
Here are the steps to perform The Child Pose:
- Start with the kneeling position. Keep the feet and toes together.
- Now, spread your knees slightly apart. Inhale slowly and deeply.
- Slowly bend forward and let your chest rest between the thighs. Exhale as you are bending down. Let your hands be in front of you and resting on the floor, palms facing the mat.
- Adjust your pelvis and sacrum in such a way that your abdomen rests between the inner thighs and the back is stretched forward.
- The forehead should rest on the floor and palms facing downwards, fully touching the mat. The arms should be in line with the knees and fully stretched out and relaxed. If you have difficulty resting the forehead on the floor, you may use a pillow for support.
- Breathe normally in this position and feel the deep relaxation. Remain in this position for as long as you are comfortable.
- To release the pose, move your hands back and slowly raise yourself up to the kneeling position.
The Standing Forward Bend Pose (Uttanasana)
The Standing Forward Bend Pose or Uttanasana is one of the most versatile poses of yoga for maintaining youthfulness. It involves intense bending of the hips and creates a very flexible body. In Sanskrit, Ut means ‘Intense’, Tana means ‘Stretched’ and Asana means a ‘Pose’.
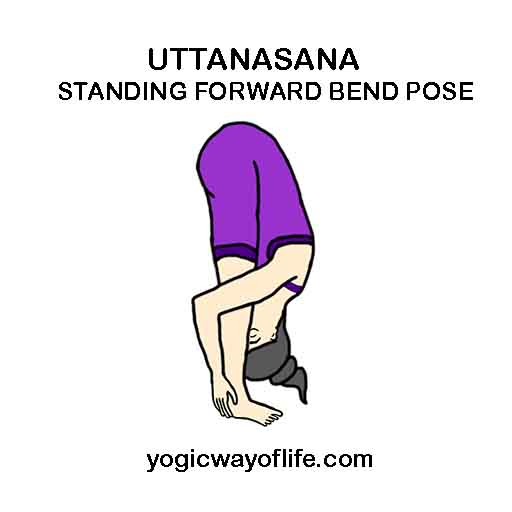
Here are the steps to perform The Standing Forward Bend Pose:
- Come in standing position or Tadasana with your hands placed on your hips.
- Take a deep breath and expand your chest. Slowly exhale and fold over the hips and bend forward. Keep the torso and head in one line. Your upper body will be perpendicular to the legs.
- Now bend further and try to place the hands on the floor on the side of the legs (This requires some level of flexibility). If you are not able to touch the floor with the hands, do not strain. Just go as far as you can without pain. Do not bend your knees while performing this asana.
- Maintain this position for as long as you are comfortable.
- To exit, inhale and bring back the hands on the hips and raise yourself up to the standing position.
The Plough Pose (Halasana)
The next pose in the ‘gain inner peace with yoga postures’ series is The Plough Pose or Halasana. In Sanskrit ‘Hal’ means a ‘plough’ and ‘Asana’ means ‘pose’. Since in Halasana, the body resembles the plough that is why it is called the Plough Pose. Halasana can remove fat from the waist and improve the health of the abdominal organs, especially the kidneys, pancreas and intestines. Also, it increases the circulation in the thyroid, adrenal, pituitary glands, and send out feel-good hormones or endorphins in the body, which in turn help boost metabolism also.
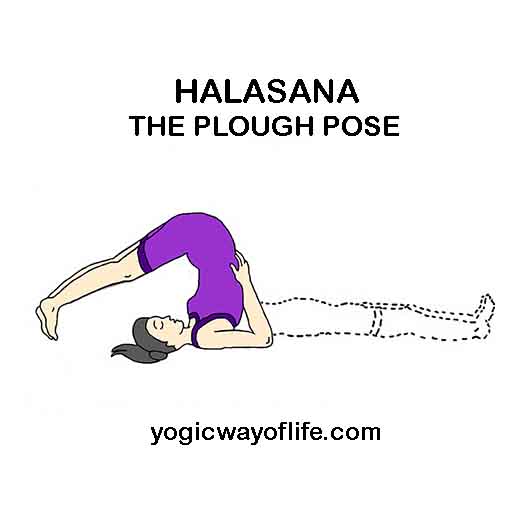
Here are the steps to perform The Plough Pose:
- Lie down on your back. Relax fully and breathe normally.
- Keep your legs together and the hands should be kept close to the body.
- Hold your breath and slowly raise your legs to vertical position. Make sure you do not use the arms to lift the legs.
- Move your legs further back as much as possible. At this stage you can use your hands to support your lower back and to further push the waist and trunk, until the legs touch the floor.
- You can move your legs as further from the head as possible. At this stage you will achieve a chin lock. And the pressure will be on the thyroid glands.
- Stay in this position for a few seconds to a few minutes depending on your level of comfort.
- To exit, slowly come back to the normal position.
- Now relax all the muscles and breathe normally.
The Warrior Pose (Virabhadrasana)
The warrior pose or Virabhadrasana is named after the legendary warrior Virabhadra in the Puranas. In Sanskrit, Vira means ‘Brave’, Bhadra means auspicious and Asana means a ‘Pose’. This asana relieves stress and improves nervous balance of the body.
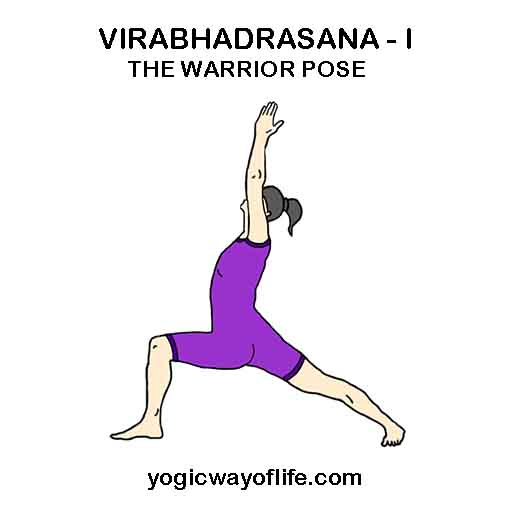
Here are the steps to perform The Warrior Pose:
- Stand straight with your legs spread out. Let there be a distance of at least 3 feet between the two feet.
- Raise your hands above the head with your palms facing each other.
- Turn to your left and slowly rotate the left foot about 90 degrees to the left so that it is aligned with the chest.
- Turn the right foot slightly (around 15 degrees) towards the inside.
- Bend your left knee and let your thighs should be parallel to the ground. However, the right leg should remain straight.
- Your head, chest, left knee and the left foot should be aligned in one direction. Now bring your palms closer so that they touch each other.
- Keep breathing slowly and deeply, stay in this position for a few breaths.
- To exit, raise yourself up and straighten the left knee. Turn to the right to go back to the original position.
- Repeat this on the other side too.
The Shoulder Stand (Salamba Sarvangasana)
Salamba Sarvangasana or Supported Shoulder Stand is actually nicknamed the Queen of All Asanas. It is one of the intermediate poses that one could master easily. Salamba Sarvangasan is essentially an extension of the plough pose. The legs along with the lower body are lifted up in this pose, and the weight of the body is supported on the head, neck, shoulders, and upper arms. This asana is a deep stretch for your back and neck. This asana helps to have increased blood circulation and it reduces any kind of imbalance.
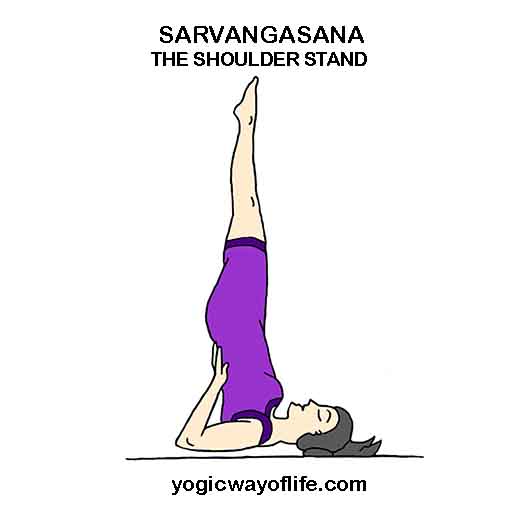
Here are the steps to perform The Shoulder Stand:
- Lie down on your back.
- Exhale and on an inhale, just swing your legs to allow them to come perpendicular to the mat.
- Breathe out, lift your waist off the mat, and push your legs towards your head.
- Support your waist with your palms.
- Slowly, straighten the legs in such a way that your entire body is perpendicular to the mat.
- Hold the posture for seven to nine breaths.
- To exit the pose, slowly release the torso to the floor, vertebra by vertebra.
The Corpse Pose (Shavasana)
The final pose in ‘gain inner peace with yoga postures’ series is Shavasana.
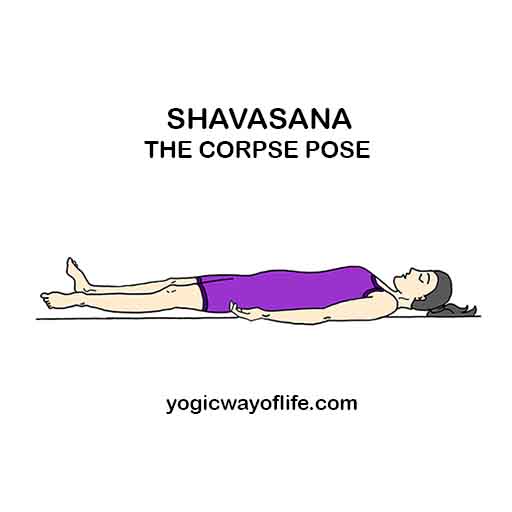
Your poses to gain inner peace with yoga should be concluded with Shavasana. In Sanskrit, Shava means ‘Corpse’ and asana means ‘Pose’. This Asana is created by observing corpse. Shavasana is the best asana to calm your mind, release any kind of stress in the body and sink in all the asanas at a deeper level.
Here are the steps to perform The Corpse Pose:
- Lie down on your back.
- Legs spread apart
- Place your arms beside your body facing upwards.
- Take deep breaths
- Stay in the pose for at least 2 minutes and then release the pose.
To pan out…. We all aspire for inner peace and performing these poses mentioned above are the best way to achieve balance between mind, body, and spirit and have a
